f

Sunday, December 22, 2013

The Most Wonderful Time of the Year!

The day we got back from Thanksgiving in the Basin we started decorating for Christmas. It really is the most wonderful time of the year! I LOVE decorating for Christmas. One of my favorite things this year was going to Sun River Gardens. I loved looking at threw all of their Christmas things, from trees, garland, wreaths and beautiful poinsettias.


Our yearly tradition of going to see Temple Square we met by a very snowy day but it was absolutely beautiful! We stopped and ate in American Fork at the Melty Way, a gourmet grilled cheese place that is delicious! We shopped at City Creek, ate at Cheesecake Factory, and walked around Temple Square!


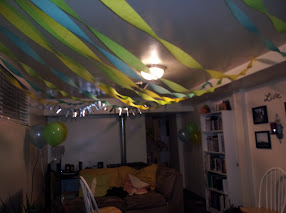
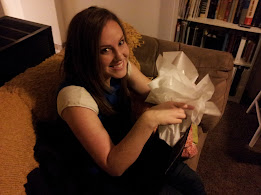
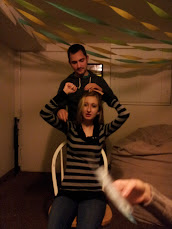
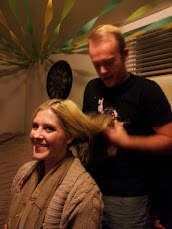
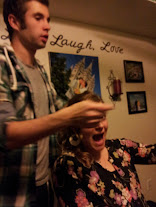
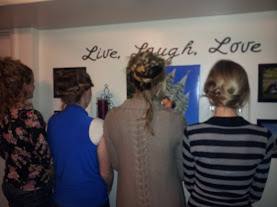
We had an awesome Christmas Party with our friends! It was so fun to plan and party!


Tuesday, November 19, 2013

Graduation Celebrations


This weekend has been one of the best! I got to celebrate my graduation several times! Friday night I made plans to go and pick out jewelry for my graduation with a friend. I got some really cute pieces and after we were done shopping we decided to go to my place and watch a movie. So we get there and I open my door to a SURPRISE and a house full of decorations and friends! My sweet husband and friend had been planning a graduation party for about a month and I had NO clue! We had great food and played fun “hair games”.  The hubby also got me makeup from MAC, how great is he? LOVE HIM!
      
Photo

Photo


          Photo Photo

           Photo Photo

Photo

Saturday morning was my first free Saturday in a YEAR AND A HALF! So of course we slept in and had and amazing breakfast! My family came to town for my graduation so we spent the entire day shopping it was a blast to spend time with them. We then went to my graduation which was wonderful! It was great to remember all the fun times I've had and the great friendships I've made. After calling all of Provo/Orem restaurants for a reservation (everywhere was booked because there had been a BYU football and basketball game) finally we got one at Iggy’s and had a wonderful graduation dinner. 
                                            Photo


Saturday, November 16, 2013

The Emerald Ball

About a week ago Sam came home with an invitation for UVU's Homecoming dance. Our friends were going and they wanted us to come with. At first I was a little hesitant but after agreeing to go and actually going, I was glad we did. I got to get all dressed up and it was Sam's and I's first formal dance together! I wore a dress I made for my Jr. Homecoming dance but man have I grown! Haha! We had such a fun time dancing that it was totally worth it and we will probably go again! (Sorry about the blurry pictures, we were still trying to figure Sam's phone out!)


Justine and I getting ready

                                             Working the red carpet


                                           Handsome date and I

Tuesday, November 12, 2013

DIY Headboard


Awhile ago I saw a picture on Pinterest of a headboard that you could buy on Etsy. My immediate thoughts were, why buy it when you could make it so simply. Sure it would take time and work but if you're anything like me you don't mind it one little bit! 

I started by doing some measurement of my bed and figuring out how tall and long it would need to be. Then I sent Sam on an errand to Lowes to figure what sizes of boards we needed and how much they costed. After I figured that out I drew the dimensions on a paper of exactly what I wanted it to look like, how much wood I needed, and what I would need them cut at.

I spent two days cutting, sanding, staining, and finishing the wood. I didn't sand the wood perfectly because I wanted a rough look. I chose two different stains and just changed up how I applied them so I could get different looks on each piece of wood.
 

After all of the wood had set the required time placed them exactly how I wanted them and hammered them in place. For the life of me I COULD NOT find our hammer so I used our broken ice cream scoop. You can't get much more redneck than that!


All I had to do then was set it up in my bedroom and take pictures! I'm quite happy with the way it turned out and I've had a lot of fun doing it.


Sunday, November 10, 2013

100% Whole Wheat Pizza Crust

100% Whole Wheat Pizza Crust

INGREDIENTS

2 1/2 cups whole wheat flour, plus more for dusting

2 1/4 tsp active dry yeast

3/4 tsp salt


1 cup warm water


1 tbsp extra virgin olive oil


1 tbsp sugar


DIRECTIONS

1. In a small bowl, combine yeast, water and 1 tsp sugar. Let sit for five minutes.

2. In a large bowl or the bowl of a stand mixer, combine 2 cups flour, salt and remaining sugar. Make a well in the center and add yeast mixture and olive oil.


3. Stir using the paddle attachment or a spoon until the dough just comes together, then knead, either by hand or in a stand mixer fixed with the dough hook, for about 5 minutes (3-4 minutes if using stand mixer). Add remaining flour in 1 tbsp increments just until dough pulls away from sides of the bowl or is no longer sticky.


4. Shape dough into a ball, place in a lightly greased bowl and cover with lightly greased plastic wrap to rise until doubled, about 45 minutes to 1 hour.


5. Punch down risen dough, shape into a ball and place on a lightly floured pizza stone.

Roll out into a circle of desired crust thickness and let rest about 10 minutes (at this time you can put on your desired toppings).

6. Preheat oven to 500 degrees F. Place pizza in oven and bake about 10-15 minutes, or until crust is golden brown and toppings are baked. Let pizza rest for about 10 minutes before slicing.

Wednesday, October 2, 2013

Schooling Update

Have to take a second and brag! I recently took my state boards for cos school and passed them all! I'm extremely happy to finally have that stress over with. Now all I have to do is finish 200 hours and i will be done and starting new adventures!


Tuesday, September 24, 2013

About Us


We are the Smiths.
He's Sam. I'm Amberly
We met while working at Dinaland Golf Course in Vernal, Utah


Virginia boy. Utah girl.
We fell madly in Love and were married August of 2011.

We made our home in Orem, Utah.
He attends Utah Valley University studying Exercise Science.
I attend Aveda studying Cosmetology.


He wants to be a Occupational Therapist and Dad.
I want to Everything and a Mom.


You'll find him hiking, studying, or playing Xbox.
You'll find me crafting or catching up on tv shows.
We enjoy golfing, traveling, and dating together.


Welcome to my blog of everything under the sun! 
I hope you enjoy.

Friday, August 30, 2013

Contact


e-mail: amberlysmith1@gmail.com
instagram: @amberlysmith
pinterest
facebook

Freezing Fresh Corn

It's harvest time and anyone with a garden is most likely up to their ears with produce. I hate when anything goes to waste so I'm always in search of ways to store food. I love to can but it can be a very big project and you have to have all the equipment what can you do instead? Freeze it! I know this isn't the best option if your wanting to store it for long periods of time but it should be good for up to a year. 

I'll be using corn on the cob to demonstrate what you need and how to do it. First off, freezing always goes best when you have a food vacuum. It can be done without it, there's just a bigger risk of freezer burn. I don't have a food vacuum so I'll will be making do without it. I started with a dozen ears of corn, the fresher the better, so if your able to pick it right off the stalk it's going to taste really good!

1. Shuck the corn and try to get as much of the silk off as possible but if there is some let it will be fine.

2. Bring a large pot of water to a boil. Once it's boiling add the corn, I only did six at a time and did two batches. This is called blanching and is necessary for keeping the taste. Depending on the size is how long you will cook it. Small-7 minutes, Medium-9 minutes, and Large-11 minutes.

3. Once it has cooked for the needed time you will transfer it to a bowl of water filled with ice. Let it cool for the same time that it cooked adding more ice as it melts. 

4. Once its cooled down you can cut the corn off and add it to a freezer bag or a zip lock bag. Since there are only two in my family I used a sandwich size zip lock bag and only put two-three serving sizes in it. 

5. If you have a food vacuum this is where you will suck out all the air. If you have a zip lock bag like I do just try to get as much air out of it as possible and close it. I've heard of people putting a straw in it and sucking out the air then closing it. Whatever works best for you.

6. Lastly you can mark the bag with the date it was made. It should last about a year as long as there is not bad freezer burn.

Note: When you are ready to eat it just put the bag in the microwave and heat it up for a couple of minutes.


Tuesday, August 27, 2013

Late Night Bowling Parties

On Monday nights at Miracle Bowl you can bowl unlimited from 9-11 for just $8 a person (that includes your shoes)! We, and a couple of Sam's coworkers and husbands decided to take advantage of it. We showed up at nine and were able to get in four games! It was such a blast and everyone was getting very creative, especially in the starburst game. If you haven't played that way, I definitely suggest it. You can also play it with skittles. But anyways, how to play; for each color choose a different move for instance, red could mean bowling with our eyes closed, yellow could mean bowl laying down. You put all the candy in a bag and whenever it's your turn you just close your eyes choose a piece of candy and whatever you get you have to do. This makes the game very interesting and you'll be getting stares from everyone! Have to give it up for the mister though, he doesn't enjoy bowling too much but our last round he killed everyone and even had a turkey!